Configuring Backup and Recovery Functions
Section 1: Hands-On Demonstration
Part 1: Install Windows Server Backup
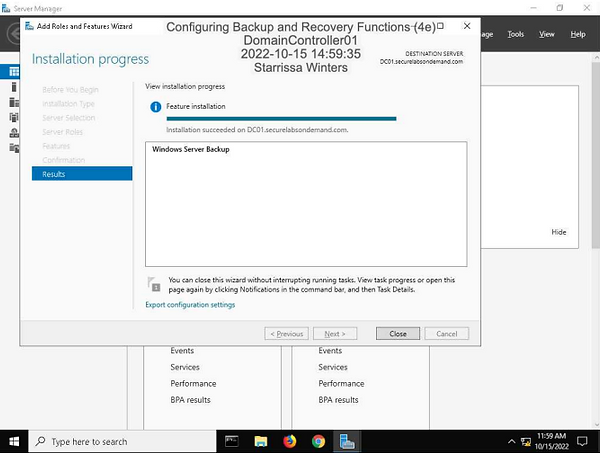
Make a screen capture showing the completed Windows Server Backup feature installation.
Part 2: Configure a System State Backup
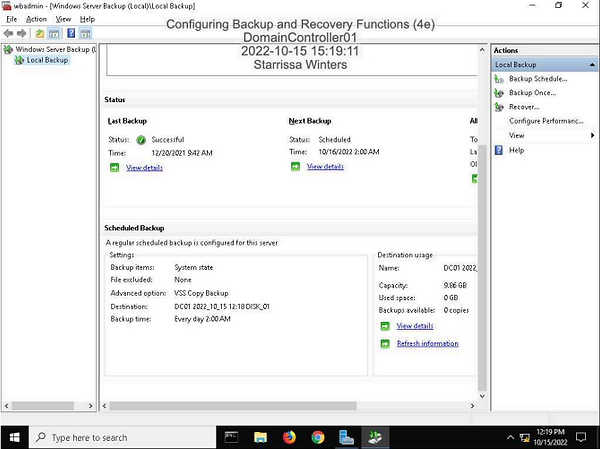
Make a screen capture showing the Scheduled Backup settings, including the destination and backup time.
Part 3: Restore from a System State Backup
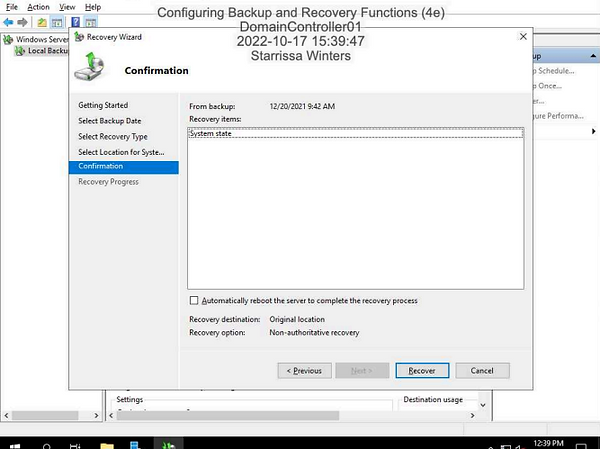
Make a screen capture showing the Recovery Wizard Confirmation page.
Section 2: Applied Learning
Part 1: Configure an NFS Share
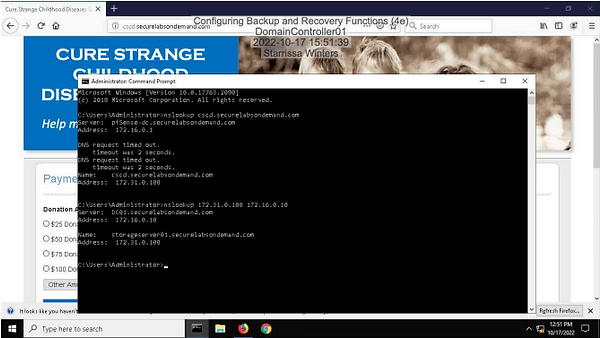
Make a screen capture showing the results of the reverse DNS query.
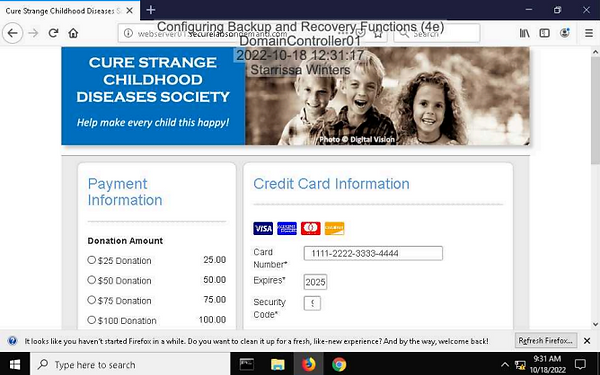
Make a screen capture showing the updated webserver01 home page.
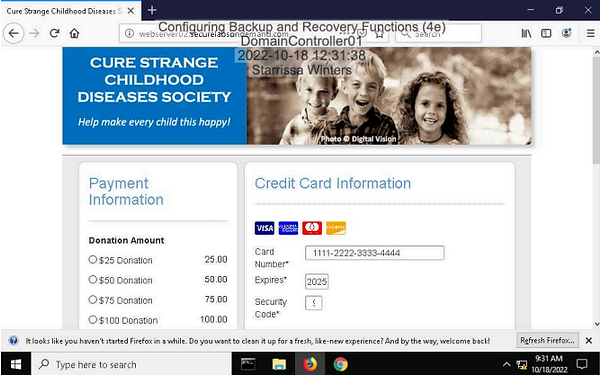
Make a screen capture showing the updated webserver02 home page.
Part 2: Configure Load Balancing
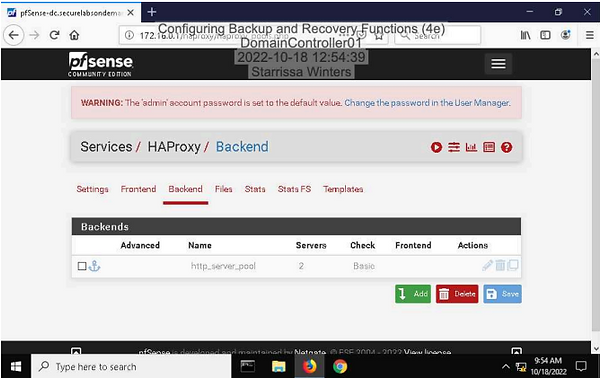
Make a screen capture showing the http_server_pool backend.
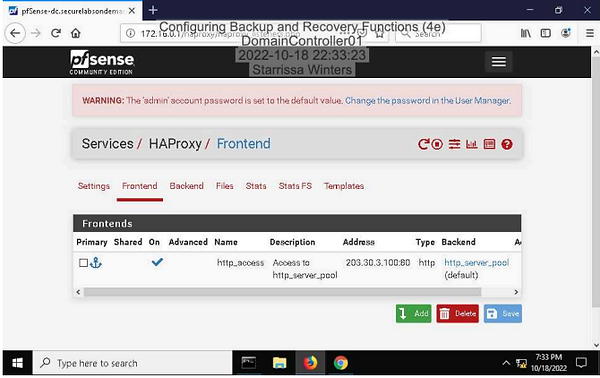
Make a screen capture showing the http_access frontend.
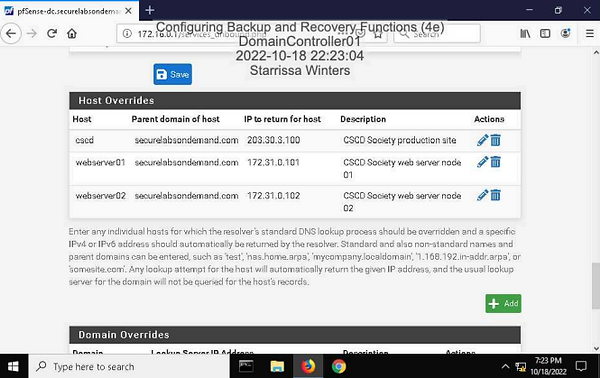
Make a screen capture showing the new Host Overrides entry for cscd.securelabsondemand.com
Part 3: Verify Load Balancing
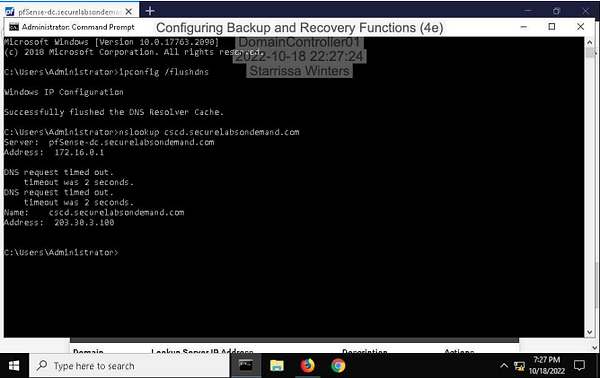
Make a screen capture showing the result of your DNS query for cscd.securelabsondemand.com
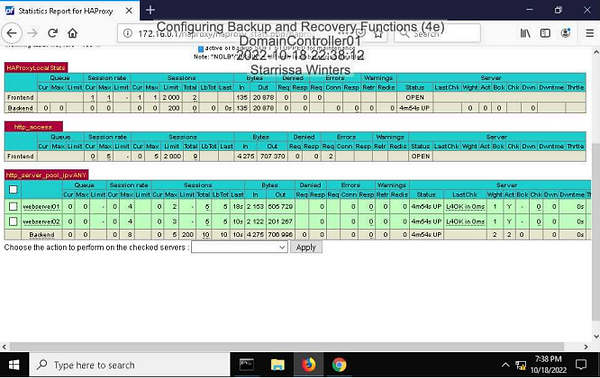
Make a screen capture showing the Statistics Report with a value of at least 1 in the Sessions > Total column of the http_server_pool_ipvANY box, for both webserver01 and webserver02.
Section 3: Challenge and Analysis
Part 1: Add Failover Functionality

Make a screen capture showing the updated Check Frequency value in the Health checking module.
Part 2: Validate Failover Functionality
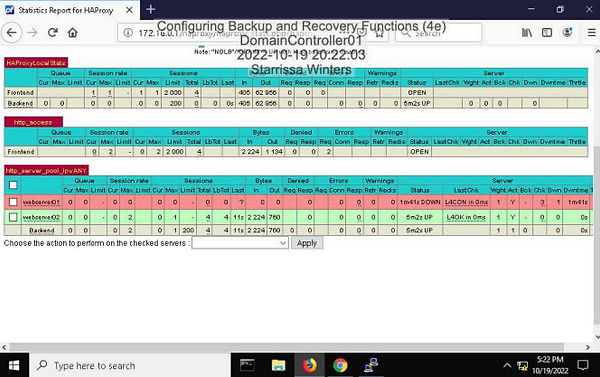
Make a screen capture showing the HAProxy Statistics Report with a host in a DOWN state, as well as the UP host having more total sessions (http_server_pool_ipvANY, Sessions > Total) than the DOWN host.